Displaying live Instagram posts in your email campaign is a great way of attracting new followers for your social media accounts or for promoting social campaigns and competitions.
Posts can be added from either a specific Instagram account or a hashtag.
Each time a customer opens the email containing the live Instagram posts image it is refreshed to show live posts.
In this example we are going to create a simple image showing the latest posts from the account kimkardashian.

How to create a Instagram image:
Create a New Image
When creating a new image select the ‘Instagram’ data source.
Select whether you want to use our template, upload a background image to work from or start with an empty canvas
In this example we are creating an image using the template.
The Instagram data source requires you to create a design for a single post, and then you can customise the tags later on to add as many images as required.
Settings Panel
The first thing to do when creating a new image is to adjust the settings in this panel.

Image Name
This is the name of the image you can change at anytime.
Labels
Labels are handy words you can assign to the image to help you search for it later. Use the enter key to save each label and add as many as you wish.
Lock
Once you have finished editing the campaign and you are ready to send an email using this image we recommend locking the campaign from further changes to prevent accidental edits as these will show immediately in any images viewed by your customers.
Canvas Panel
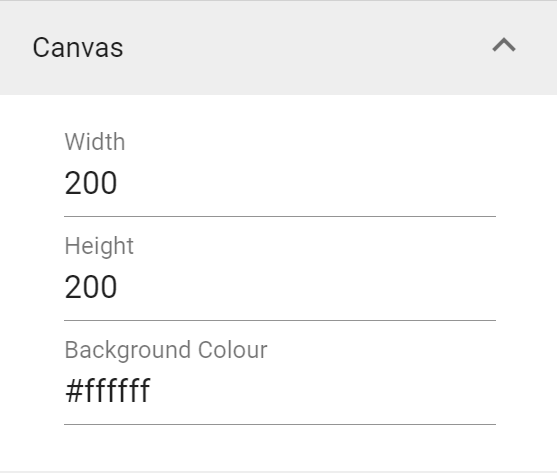
Choose canvas size
The width and height of the canvas is set in pixels. You can change this at anytime. Changing the width will add or crop the canvas on the right hand side, while changing the height will add or crop from the bottom of the canvas.
As we have a 600px wide email, and I want 3 Instagram images on the same row I will leave this as 200 wide and 200 high. Images returned by instagram are always square.
Background Colour
Choose a hex colour using the picker or by entering a value here. The background colour will now change. If you have a background image covering the entire canvas you won’t see the background colour.
Links & Fallback Panel

Link
Enter the URL where you would like to take anyone clicking on the image. Use the jigsaw piece to add merge tags from the data source into the URL. Here we will choose the URL merge field that will link to the Instagram post.
Fallback Image
In the event the data source returns no data you can specify a different image to show or a 1x1 transparent pixel so nothing is visible to recipients.
Fallback Link
If you have added any merge tags to the above link, and in the event these merge fields are all empty then you can specify a fixed URL to take the clicking customer to. This prevents any unwelcome 404’s of broken links in the event your Instagram search returns no results.
Preview Values
In the Preview panel we can add example values to allow us to see what the image will look like with values from a live post while editing.

The Instagram data source takes these search terms:
Search Type
- Hashtag: This allows you to search for posts with a specific hashtag. There is no need to include the #
- Profile: Enter the Instagram account name to return their posts
For this example we are using ‘Profile’ and have entered ‘kimkardashian’.
Creating our image in the canvas
Next, we can start creating our image. We created the image from a template. This is a very simple template that just consists of the thumbnail image of the post.
The image you see on canvas is the preview image of the post image to aid with editing. If you switch to preview mode you will see the first Instagram post image.
If we want to add any further elements like the number of likes, or static images, text or shapes we could add these as per other examples but for now we just want to leave it as it is.
However, to get an understanding of what data fields are available with Instagram here is the list:
Field | Description |
| |
PROFILE | |
User | The username of the profile |
Full Name | The full name of the Instagram profile owner |
Biography | The Instagram owners biography as seen in their profile |
Profile Pic | The URL to the users profile image |
Follower Count | The number of followers the account has |
Profile URL | The full web address of the users Instagram profile |
| |
POST | |
Post Text | Text the owner has added to the post |
Post URL | The web URL of the post |
Post Image | The image URL of the post |
Post Likes | Count of current post likes |
NOTE: Profile fields are only available on a profile search. All fields are available on a post search.
To preview the image use the switch at the top of the page to move from edit to preview.

Add the tags to your email template
Once you are happy with your image click on ‘Generate Tags’ top right to open up the dialog.
On the first open of this dialog you will see it has pulled into the ‘Configuration’ section your preview values.

In this example we don’t want to change these, but you can update these here each time you want to use the same image but pull through different type of posts. This saves you from having to create many different images.
Next, we can customise the tag and specify how many posts we want to add to the email. We do this by specifying this in ‘Items’. We can also change the result we start at. So, for example if you actually want the tags to start at the 2nd post enter 2 here.
This can be used to have different looking posts by creating different images, and then changing the start number on each post.
The identifier field is a piece of syntax you get from your email provider that identifies the individual opening the email. This could be the email address, or a customer ID. It is essential you add one here to reduce the amount of credits deducted by Reignite on each campaign. For more details on adding this read our guide.
Under the ‘Your Tag’ you will now see the HTML to copy and paste to your email template – use the copy button provided to ensure the whole tag is copied correctly.
Depending on how your email template is coded you may need to paste each image into individual areas of your template rather than all in one block or read our detailed guide on adding tags to your email template here.
And that’s it. That is how to add live Instagram posts to your emails.
